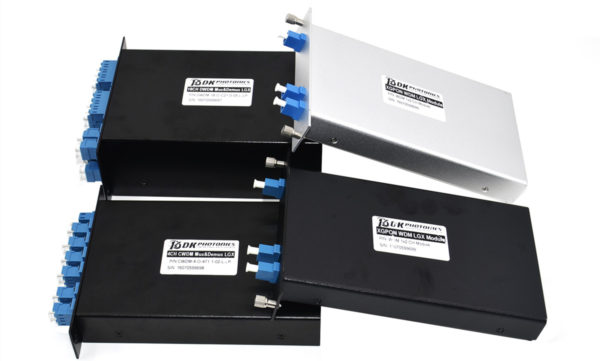
Do you need to enhance the capacity of a fiber optic network without adding more fibers? If yes, CWDM Mux/Demux is the device you are looking for. To help you learn more about this, let’s discuss what it is and how to install it.

What does CWDM Mux/Demux mean?
CWDM is the acronym for Coarse Wavelength Division Multiplexing. This technology is specially developed to boost the fiber optic network capacity without requiring any additional components.
In a CWDM system, Mux/Demux is the most significant module as it helps in increasing the current fiber cable capacity by transmitting multiple wavelengths, up to 18 separate signals over a single fiber. This module is a passive device and easy to use. It can be availed in a variety of wavelength combinations, generally from 1270 nm to 1610 nm (20nm spacing).
Depending on different applications, it can be designed and manufactured into different channels. For instance, to multiplex 4 different wavelengths onto one fiber, a typical 4 channel Mux/Demux module is used. This will allow you to transmit four different data over the same fiber at the same time.
In case, you are using a CWDM multiplexer at the starting point of your network, you have to use a CWDM demultiplexer at the opposite end in order to separate the multiplexed wavelength or data so that they can be redirected to the correct receivers.
So, CWDM Mux/Demux is basically a module that can be used as a multiplexer or demultiplexer at either end of the fiber cable span. However, you still need to use it in pairs.
Things to Consider While Installing a CWDM Mux/Demux Module
A typical CWDM Mux/Demux system consists of a local unit, CWDM Mux/Demux module, and a remote unit. The local and remote units refer to two different switches.
Before installing the module, a chassis needs to be installed first to hold the module. Then, CWDM SFP transceivers should be installed to connect the CWDM Mux/Demux module to a switch and after that transceivers should be connected to the module by using single-mode patch cables.
To build a CWDM Mux/Demux System, we need a rack-mount chassis, CWDM SFP transceiver, and single-mode fiber cables.
Four Basic Installation Steps of CWDM Mux/Demux System
Step 1: Install the Rack-mount Chassis
Mount the chassis in a standard 19-inch cabinet or rack. During the mounting procedure, keep in mind that the chassis should be positioned in the same rack or adjacent rack to your system. This way, you can easily connect all the cables between the Mux/Demux modules and transceivers in the system with ease.
Step 2: Install the Mux/Demux Module
First, align the module with the chassis shelf and gently push the module in the shelf cavity. Then, secure the module with captive screws.
Step 3: Connect Mux/Demux to Switch
Insert the CWDM SFP transceiver into the switch. Once inserted, connect the transceiver to the Mux/Demux module with single-mode patch cable.
Note: The wavelength of the Mux/Demux module and transceivers should be the same because each transceiver will function at the designated port and data always transmit between devices that have the same wavelength. To make the connection, you can use color code of the transceiver.
Step 4: Connect the Mux/Demux Pairs
After using CWDM multiplexer at one end of the network, install CWDM demultiplexer at another end. Your last step would be to connect this pair. If you are using duplex Mux/Demux, you should make the connection by using a pair of single-mode patch fiber. However, for simplex Mux/Demux, only one single-mode patch fiber is sufficient.
Once you go through all these steps, your CWDM Mux/Demux system will be successfully installed.